How To Remove Spray Foam Insulation
Spray Foam Insulation (Spf) Is A Popular Choice For Improving Energy Efficiency, Sealing Air Leaks, And Controlling Moisture In Homes And Buildings. Its High R-Value, Durability, And Long-Lasting Perf...
- Understanding Spray Foam Insulation Types
- Open-Cell Spray Foam
- Closed-Cell Spray Foam
- Canned Foam
- Why Remove Spray Foam Insulation?
- Safety Precautions for Spray Foam Removal
- Protective Gear
- Ventilation
- Professional Pre-Inspection
- Disposal
- Tools and Materials for Spray Foam Removal
- Hand Tools
- Power Tools
- Step-by-Step Guide: How to Remove Spray Foam Insulation
- 1. Preparation
- 2. Manual Removal Process
- 3. Machine-Assisted & Clean-Up
- Chemical and Natural Removal Methods
- Chemical Foam Removers
- Natural Alternatives
- Removing Spray Foam from Different Surfaces
- Wood
- Concrete
- Metal
- Fabric, Carpets & Clothing
- Skin
- Professional Spray Foam Removal Services
- Benefits of Choosing Superior Attic
- Situations Where Professionals Are Recommended
- Preventing Future Spray Foam Issues
- Frequently Asked Questions
- Can all types of spray foam insulation be removed?
- How long does the removal process typically take?
- Is it safe to remove spray foam insulation myself?
- What should I do if spray foam gets on my skin?
- How much does professional spray foam removal cost?
- Safe and Effective Spray Foam Removal Made Simple
Spray foam insulation (SPF) is a popular choice for improving energy efficiency, sealing air leaks, and controlling moisture in homes and buildings. Its high R-value, durability, and long-lasting performance make it a reliable solution for many property owners.
But what happens when you need to remove it? There are many reason why spray foam removal is essential and depending on your specific reason, the removal process can be a simple weekend chore or a complex task.
In this blog post, we’ll explain how to remove spray foam insulation safely and effectively. We’ll cover the best techniques, essential spray foam removal tools, and when it’s time to call in professionals.
Understanding Spray Foam Insulation Types
Spray foam insulation comes in several varieties, each with different properties that affect how you remove it. Knowing the type installed in your home or building helps you choose the right removal method and safety precautions.
Open-Cell Spray Foam
Open-cell spray foam is soft and flexible, almost like a sponge that traps air in its open cells. It expands quickly and is lightweight, making it great for interior spaces like walls and attics. Because of its spongy texture, it can be easier to tear or scrape away compared to denser foams.
Closed-Cell Spray Foam
Closed-cell spray foam is denser and rigid, offering stronger insulation and structural support. It seals tightly against moisture, thus it’s ideal for basements, crawlspaces, and exterior walls. Its hard surface makes removal more challenging and often requires specialized tools.
Canned Foam
Canned foam is commonly used for small DIY jobs or patching gaps. It’s easy to remove while still uncured but becomes very stubborn once it hardens. This type of foam insulation requires patience and care during removal to avoid damage to surrounding surfaces.
Why Remove Spray Foam Insulation?
Homeowners and contractors choose spray foam removal for several important reasons, often related to safety, performance, or access needs.
- Improper installation can cause moisture buildup, mold growth, and block ventilation pathways. This leads to long-term damage and poor indoor air quality,
- Health concerns arise because exposure to isocyanates during application or removal may trigger asthma and other respiratory problems. The EPA highlights these risks in its chemical exposures guide.
- Real estate complications due to lenders refusing homes with very old or improperly installed spray foam insulation.
- Spray foam often seals walls, roofs, wiring, and pipes, making renovations or repairs difficult without removal. This is especially true when removing spray foam from the wood framing or other sensitive materials.
- Some property owners want to upgrade to more breathable or eco-friendly insulation options to improve comfort and sustainability.
Unhealthy or improperly installed spray foam insulation can release harmful chemicals and promote mold growth, posing serious risks to your health and indoor air quality. Many clients only realize these issues after installation, which highlights the value of a professional removal assessment before deciding on spray foam removal.
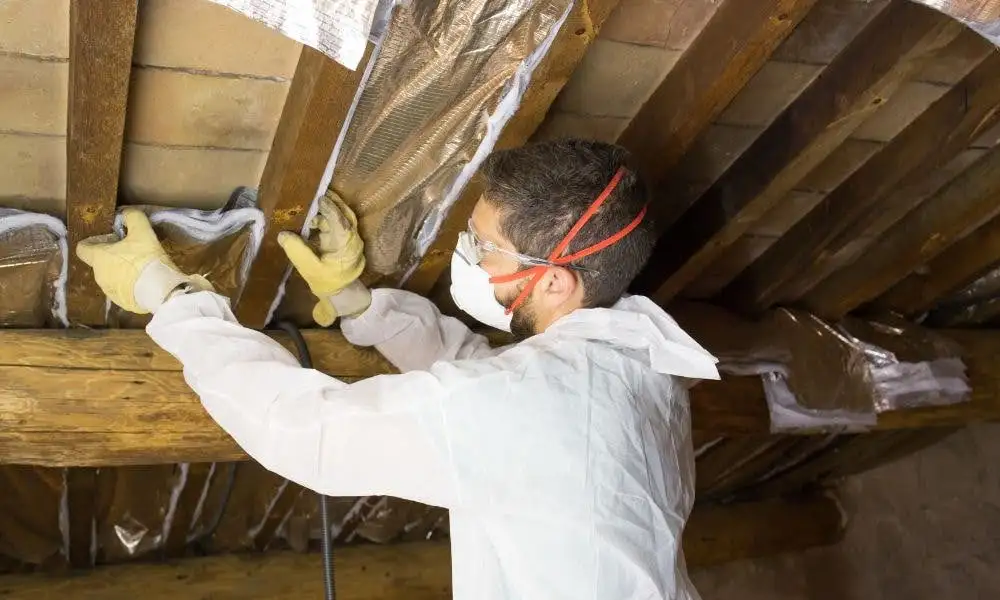
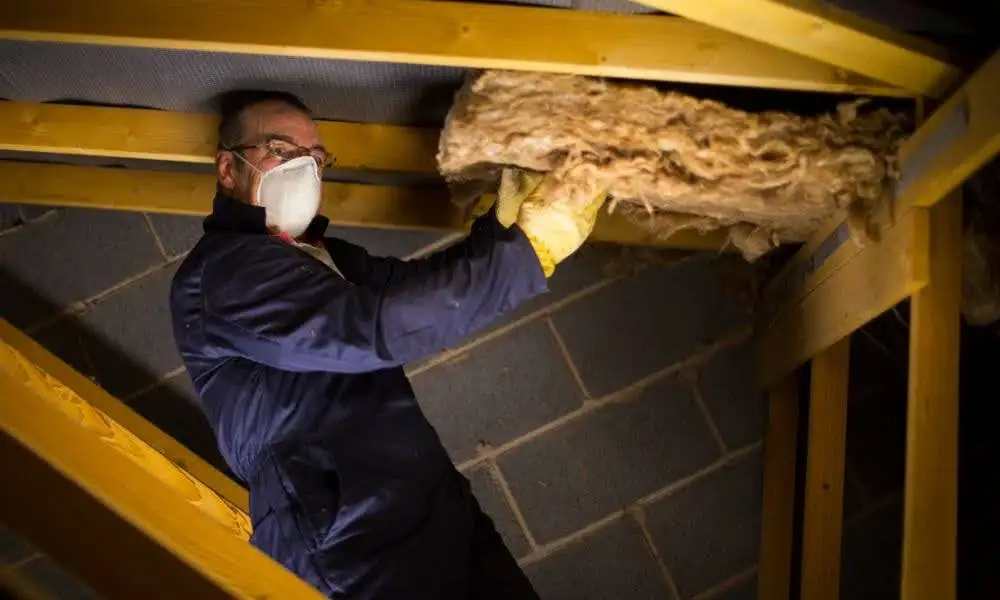
Safety Precautions for Spray Foam Removal
Removing spray foam insulation involves risks that require careful attention to safety. Understanding how to protect yourself and handle the material properly helps prevent health problems and ensures the job gets done right.
The following are ways of minimizing exposure and managing hazards during the removal process.
Protective Gear
Wearing the right protective gear is essential when you remove spray foam insulation. This includes respirators to protect your lungs from harmful fumes and dust, gloves to shield your hands, goggles to keep chemicals out of your eyes, and full-body suits to prevent skin irritation.
Proper gear minimizes exposure to isocyanates and other irritants that can cause respiratory issues and allergic reactions.
Ventilation
Good ventilation is critical during removal to clear airborne chemicals and dust. Opening windows, using fans, or setting up negative air machines helps circulate fresh air and reduce the concentration of harmful particles. Without proper airflow, these substances can linger and increase health risks.
Professional Pre-Inspection
A trained technician should always conduct a pre-inspection before starting removal. They can identify the type of insulation, detect mold or structural damage, and determine the safest removal method for your specific situation.
At Superior Attic, we provide thorough assessments to guide the removal process safely and effectively.
Disposal
Spray foam waste must be handled according to local insulation disposal regulations to protect the environment and comply with laws. Improper disposal can lead to fines and contamination.
Tools and Materials for Spray Foam Removal
Removing spray foam insulation requires the right tools. Using the proper equipment helps you work efficiently and safely while minimizing damage to surrounding surfaces.
Hand Tools
- Serrated blades or insulation knives: Cut through soft foam quickly, especially open-cell types. Always handle knives with care to avoid injury.
- Flat bars and putty knives: Pry foam off surfaces gently without damaging wood or drywall. Use steady pressure to prevent slips.
- Wire brushes or curry combs: Scrape away stubborn foam residue or clean textured surfaces. Wear gloves to protect your hands from sharp bristles.
These hand tools give you control and precision, making them great for detailed work or smaller jobs. The downside is they can be labor-intensive and time-consuming on thick or large areas.
Power Tools
- Saw with fine-tooth blade: Cut through thick or hard-to-reach foam quickly, especially dense closed-cell foam. Always wear eye and ear protection when using power saws.
- Power drill with wire wheel attachment: Scrape and sand large sections of hardened foam efficiently. Use at moderate speed to avoid damaging the surface underneath.
- HEPA-filter vacuum: Vacuum dust and particles during and after removal to keep the area clean. HEPA filters trap harmful microscopic debris, protecting your lungs and improving air quality.
Here’s a quick comparison of these tools to help you decide which ones are best for your spray foam removal project
Step-by-Step Guide: How to Remove Spray Foam Insulation
1. Preparation
- Begin by assessing the area: How much foam is there? Is it open-cell or closed-cell? Knowing this helps you choose the right tools and approach.
- Check the surface material—wood, drywall, or concrete—as it affects what tools you’ll use.
- Move furniture out of the way, tape off the area to protect walls or vents, and cover floors with tarps to catch debris.
- Always wear full protective gear during removal and turn off HVAC systems to prevent spreading dust and fumes.
- Gather all your tools before starting.
2. Manual Removal Process
- Start cutting by slicing large chunks with a serrated knife or saw.
- Scrape away the remaining foam gently using a flat bar or putty knife. If foam is stuck, warming the area slightly with a hairdryer or heat gun can help loosen it.
- Work carefully through layered sections. Patience is key here. DIYers can handle small to moderate areas at this stage, but if you’re dealing with dense closed-cell foam or hard-to-reach spots, this is where professional equipment and expertise make a big difference.
- Vacuum debris regularly with a handheld HEPA vacuum during removal to keep dust down and prevent buildup.
3. Machine-Assisted & Clean-Up
- For tough, stubborn foam, especially closed-cell, use power drills with wire wheel attachments or reciprocating saws.
- Follow up by vacuuming thoroughly with a HEPA-filter vacuum; regular vacuums won’t capture harmful fine particles.
- Wipe down surfaces with a mild solvent or vinegar to remove residue. Seal debris tightly in plastic bags for disposal according to local insulation disposal regulations.
- This stage is strongly recommended for professionals. Handling power tools and managing hazardous dust requires experience and safety measures beyond typical DIY capabilities.
- Keep cleaning as you go—don’t wait until the end to start cleanup. This helps reduce airborne dust and speeds up the overall process.
Chemical and Natural Removal Methods
Spray foam removal isn’t limited to cutting and scraping. There are chemical and natural options that can help soften or break down foam, especially for stubborn patches or small spots.
Chemical Foam Removers
Chemical foam removers are commercially available products that help to break down cured spray foam that has hardened over time. Common chemicals include acetone, lacquer thinner, and specially formulated commercial removers.
While these products can be effective, they come with risks: they can damage surfaces like fabrics and walls, produce strong fumes, and require careful use with proper ventilation and full protective gear.
Natural Alternatives
For less aggressive removal, some homeowners turn to natural options like olive oil, vinegar, or WD-40. These are especially handy for small DIY jobs, such as removing overspray or foam stuck to skin.
Natural methods take longer to work, softening the foam enough to scrape it away more easily, but they often don’t fully remove all residues on their own.
Removing Spray Foam from Different Surfaces
Removing spray foam varies a lot depending on the surface involved. Using the right tools and methods helps avoid damage and speeds up the cleanup. Here’s how to tackle common materials.
Wood
Use sharp spray foam removal tools like serrated knives and putty knives to carefully cut and scrape away foam. Avoid aggressive scraping that can gouge the wood. Finish by sanding lightly to smooth any rough spots.
For stubborn residue, a small amount of acetone spray foam cleaner can help, but test it first on a hidden area to avoid discoloration. If foam is deeply embedded, professional refinishing may be necessary.
Concrete
Scrape foam off with a putty knife or wire brush. Power tools like an angle grinder with a wire wheel can speed up removal on large patches but require caution to avoid surface damage.
Avoid harsh chemicals that may stain concrete. After removal, sweep and vacuum dust, then seal exposed concrete to prevent moisture issues.
Metal
Cut and scrape foam carefully using razor blades or scrapers designed for metal surfaces. Avoid tools that can scratch or gouge the metal.
For leftover residue, use acetone spray foam cleaner sparingly to dissolve foam without damaging the finish. Wear gloves and ventilate the area well. Severe contamination may require professional cleaning or refinishing.
Fabric, Carpets & Clothing
Remove uncured foam immediately by blotting with a cloth and using a mild solvent like acetone or commercial spray foam remover.
For cured foam, gently scrape with a dull knife and apply solvent carefully to avoid spreading stains. Many fabrics and carpets are hard to restore once foam cures, so professional cleaning or replacement might be the only option.
Skin
Remove wet foam quickly with soap, warm water, and a cloth. For cured foam on skin, use a commercial spray foam from skin remover or acetone carefully applied with a cotton ball. Never use harsh scraping that can damage skin. If irritation occurs, seek medical advice promptly.
Use these tips and the right products to safely and effectively remove spray foam from any surface. When in doubt, calling a professional can save time and prevent costly damage.
Professional Spray Foam Removal Services
When should you consider hiring a professional to remove spray foam insulation? If you’re facing a large area, dealing with stubborn foam, or worried about damaging your home, professional help is often the safest and most efficient choice.
Large removal jobs require heavy equipment, industrial vacuums, and specialized ventilation systems that DIYers usually don’t have. Trying to remove foam yourself can lead to damage of drywall, flooring, or roofing structures. Plus, if you’re selling your home or handling insurance claims, certified removal and documentation might be necessary for compliance.
Benefits of Choosing Superior Attic
- Expert technicians trained in safe, efficient spray foam removal
- Access to industrial-grade tools and HEPA filtration systems
- Strict adherence to safety and environmental regulations
- Careful handling to prevent damage to your home’s surfaces
- Full disposal of waste materials according to local codes
- Post-removal inspection and customer satisfaction follow-up
Situations Where Professionals Are Recommended
Professional removal is the best option when dealing with large or hard-to-reach areas, closed-cell foam, or foam contaminated by mold or moisture. It’s also wise to call in experts if you need removal for real estate compliance or if the foam covers sensitive wiring and plumbing.
In any case where safety, health, or structural integrity might be at risk, Superior Attic’s trained team offers reliable, worry-free service.
Need help removing spray foam insulation? Contact Superior Attic for a professional assessment and safe removal service in Dallas-Fort Worth.
Preventing Future Spray Foam Issues
The best way to avoid the hassle of spray foam removal is to prevent problems before they start.
Proper installation is key. When spray foam is applied correctly by trained professionals, it seals gaps without trapping moisture or blocking ventilation. This helps prevent mold growth, structural damage, and poor air quality.
Regularly inspecting your insulation also helps catch issues early. Look for signs of damage, moisture, or pest activity, and address them before they worsen. Superior Attic can help you choose options like blown-in insulation that are easier to maintain and inspect over time.
Finally, use the right type of insulation for each space. Open-cell foam works well in dry, interior areas like walls and attics, while closed-cell foam is better suited for moisture-prone places like crawlspaces and basements. Matching insulation to the environment reduces risks and improves long-term performance
Frequently Asked Questions
Can all types of spray foam insulation be removed?
Yes, but with varying levels of difficulty. Open-cell foam is softer and easier to cut or dissolve, while closed-cell foam is rigid and often bonded to surfaces, making it more labor-intensive. For inaccessible areas, removal might require cutting into drywall or structural components. For large jobs, professional help is highly recommended.
How long does the removal process typically take?
It depends on the area size, foam type, and method used. A single wall panel might take 1–2 hours, while a full attic project could take several days. Removal involving chemical solvents or difficult surfaces may extend timelines further.
Is it safe to remove spray foam insulation myself?
Small DIY jobs are manageable with protective gear and ventilation. However, health risks from isocyanates and improper removal can cause damage or exposure. The EPA warns against disturbing cured foam without precautions. Large-scale projects should always involve a certified contractor like Superior Attic.
What should I do if spray foam gets on my skin?
If uncured, clean immediately using acetone or olive oil, followed by soap and water. Do not use harsh chemicals if the foam is cured. Let it flake off naturally or consult a dermatologist if irritation occurs.
How much does professional spray foam removal cost?
Costs vary based on size and scope. In the UK, removal for a three-bedroom home ranges between £3,200 and £14,000. U.S. pricing is typically based on square footage, type of foam, and access difficulty. Add disposal and certification fees.
Safe and Effective Spray Foam Removal Made Simple
Removing spray foam insulation can be challenging, but with the right approach, it’s manageable and safe. Always prioritize safety precautions—wear proper protective gear, ensure good ventilation, and avoid rushing the process. Taking these steps protects your health and prevents damage to your home.
If you’ve chosen to tackle small areas yourself or hire professionals for larger jobs, knowing the risks and best practices makes all the difference. Proper removal not only improves your home’s comfort and air quality but also preserves its structural integrity.
When in doubt, it’s always safer and more efficient to call trained experts.
Superior Attic has the experience, equipment, and knowledge to handle spray foam removal with care and precision.
Contact us today for expert spray foam insulation removal. We’re here to help you every step of the way.